Showing posts with label DIY. Show all posts

Thursday, November 8, 2012

Chalkboard DIY

Finished Chalkboard
Whenever my boyfriend asks what what I want to do, its a 99% chance that my response will be THRIFTING! I love a good scavenger hunt through the aisles of Goodwill, and today's find was a beautiful mirror (for now). My plan is to make a message board for all of our households little needs. Another simple project that takes brings new life to the old, and the best part is there are endless possibilities! The potential for colors on the frame, sizes, styles, etc. are limitless, and who doesn't love writing with chalk?! I wanted something simple and classic; I got exactly what I was hoping for:


Materials needed:
  • Picture frame or mirror
  • Cloth 
  • Windex/cleaner
  • Newspaper
  • Cardboard (to fit into the frame)
  • Spray paint
  • Chalk paint
  • Paintbrush
  • Painted Frame and Cardboard
    Original Mirror
  • Chalk


Here is how to make the chalkboard:
  1. Take apart the frame and wipe down the all the surfaces so you have a clean canvas to work with. 
  2. Lay down the newspaper and place the frame on top. Follow directions on your spray paint can, I sprayed 3 layers of paint and had sufficient coverage. 
  3. In between layers of spray paint you can multitask by painting your cardboard with the chalk paint. I opted out of using glass in the frame because I accidentally broke the glass (oops!) but I am sure if you didn't want to use cardboard then you could stick with the glass, just make sure to use a primer and a couple extra layers of chalk paint. Again, I used 3 layers and had enough coverage.
  4. Wait for everything to dry and put it back together. Tah-da! now you have a lovely message board!

 I hope you guys enjoy! This is a super fun craft with lots of uses, for example, when hosting a dinner party you can use it as a menu board, write messages for your loved one, quotes for inspiration, a grocery list to keep you organized, and so much more!

Tuesday, October 23, 2012

Cake Stand DIY


Something I love to do is bake, but presentation definitely makes a HUGE difference. To help out with this  task there are a few simple supplies needed, most of which can be found at your local thrift store (how convenient!). Like most things I make, this project is totally versatile for personal preference. You can mix and match sizes, shapes, or colors for an eclectic mix. Even keep it simple and chic, or color coordinate! This little craft doesn't even have to be restricted to the kitchen, it would make a great jewelry holder or makeup stand.


Needed Supplies:
Thrift Store Finds

  • Plates (or try a bowl on top for a catch-all or dip)
  • Wine glass or candlestick
  • Glass glue (I used the kind that is dishwasher safe)
  • Heavy object to use as a weight
That is it for supplies, how simple! now on to the fun part~

Here is what to do:
  1. Make sure everything is clean and dry
  2. Measure out the center of the bottom plate
  3. Glue the rim of your wine glass (this will be the bottom) and carefully center it onto the plate, making sure to wipe any excess glue
  4. Measure out the bottom of the "top"plate
  5. Glue the top of our wine glass and place the plate on top, making sure it is centered and again wipe any excess glue
  6. Place your weight on top and let dry overnight


What kind of desserts will you be baking for these cute little stands? my obsession right now is anything and everything pumpkin!

Wednesday, September 26, 2012

Tribal Coasters

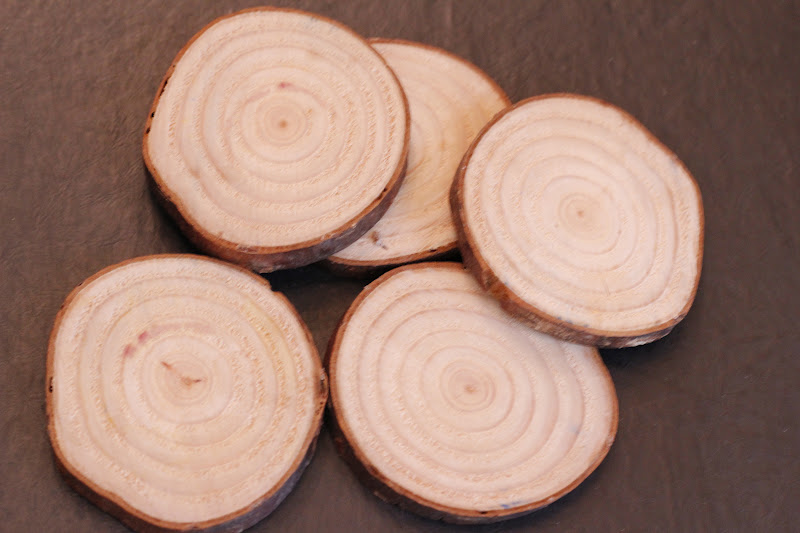
I am lucky to live at a place with lots of spare wood lying around. This helps in fostering ideas for my creative and practical side, and if there is one thing I love, its a good Anthropologie hack.

Like usual, I was getting lost in Anthropologie one day and came across some beautiful wood symbology coasters that I fell in love with but knew that I could make on my own for much cheaper, as in FREE. These coasters had a lovely mix of shape, color, and natural wood elements and although I am not be able to mimic the mother of pearl accents, I still had a starting point to aim for.

Anthropologie Symbology Coasters
So I headed to the wood pile, found a log that had the perfect diameter to set a cup on and started on my project. Again, this project was easy, affordable, practical, unique, and FUN! Here are the necessary supplies:
  • Log
  • Marker, small knife, or other means of marking wood
  • Saw - and any safety gear for using power tools
  • Sandpaper
  • Clean cloth
  • Acrylic paint
  • Paintbrush
  • Newspaper (to prevent any messes :)
Step by Step Guide:

  1. Now to get started first you can either mark where you want to start cutting your log or you can do what I did and just eyeball it. I wanted something thick enough to be sturdy but thin enough that it was not clunky. Now start cutting your coasters, I made a set of 6.                                                                                                                                       
  2. Once you have all your coasters cut, go ahead and sand both the front and back so that you have a smooth, splinter free surface. I used fine-grain sandpaper because I wanted a very clean finish on my wood. 
  3. Wipe down both sides so that all the dust and loose debris is gone and you have a clean surface for painting and lay down your newspaper so you don't make an unwanted mess. I painted my coasters freehand but if you are a perfectionist, use trial and error, or just want to make sure you love your design before committing then I suggest you lightly mark out what you want to paint with a pencil. 
  4. Start painting! I am slightly obsessed with tribal designs at the moment, so I went with a tribal theme. I used bright colors to add a cheerful accent to my room and took inspiration from a few articles of clothing I had with some of my favorite prints on them. Here is my final product!

Tuesday, June 19, 2012

O&V Bottles

Finished Project
Another easy afternoon project. I was shopping at Cost Plus World Market and for $3.99 found a set of clear glass bottles for oil and vinegar. I wanted to jazz them up and give them some character so with a little bit of time, some latex gloves, and armour-etch I created both a fun display and storage system for some kitchen essentials. 


Here is what you will need:

  • Glass bottles
  • Gloves
  • Armour Etch
  • Brush
  • Stickers or stencil
  • Tape
  • Newspaper (or some other protective surface)
WARNING: Armour Etch is a corrosive material, yes you can handle it safely, I just wanted to give a heads up so make sure to wear gloves at all times, try to keep your mess minimal, and careful washing it off so it does not splash you!

Now lets begin:
  1. Make sure your bottles are clean and dry. 
  2. Once this is done you can set up your design. You could stencil in a design or picture, use scrapbooking stickers (like I did) to keep the glass clear for the writing and etch the entire bottle around it, or stencil in your writing with cut outs. There is a lot of leeway here, I think its best to find what suits your style. I will let you know that Martha Stewart has some fantastic fonts for scrapbooks, These made my life super easy when laying out the design and making sure everything was straight and evenly spaced. I also chose to tape off the top of the bottle to ensure I had even lines, here I just used electrical tape that I had on hand, you could use scotch-tape or even skip this step.
  3. Make sure to read all directions on the Armour Etch before using it and make sure to put on your gloves. Begin to brush over the bottles in all the desired areas, apply LIBERALLY. Seriously, the more the better. I learned this the hard way and had to repeat this step because of it.
  4. When your bottles are fully coated in a thick, white, gritty substance let it sit for between 5-10 minutes. I am someone that likes to go the full amount of time for safe measure.
  5. Once time is up make sure to carefully wash the bottles in warm water. Keep the gloves on and you can rub the etching cream off under a warm tap. What you will find is a beautifully etched glass
  6. Before Etching
    Clean Dry Bottles
  7. Make sure your bottles are fully dry and clean and now you can add your oil and vinegar. TA-DA! Another beautiful project that takes less than an hour. I hope you all enjoy your new bottles with some delicious fresh french bread!

Tuesday, May 22, 2012

Upholstered Bed Skirt

On a rainy Sunday morning I decided to get creative and make some finishing touches to my room. In March I moved to a new home and although everything has been unpacked for 2 months now, the place is not fully put together. There are just some minor details that have been bothering me, for example, up until Sunday my bed looked something like this:                         


                                                                                  Before:

I am definitely embarrassed. Its awful, I know, and I am sure I am not the only one dealing with this, so I decided to make an easy, cheap, and fun fix! This tutorial is SUPER easy, although, I will give the warning that it is not an easy task by yourself, and if you can find someone to lend an extra hand it will be well worth it. Keep in mind, this is just a wrap for the edges that show, this will not fully encase the box spring, just the visible parts. Lets begin!


Supplies:

  • desired fabric. I have a Queen size bed, after measuring the box spring I decided 7 yards would fit fine because I was not going to fully wrap around the entire box, knowing that one end would always be up against the wall. If you are a perfectionist hen I suggest 7.5 yds. for a Queen. The fabric I used was burlap, I love the earthy look of it, also I did use 1 layer folded, if you do not use this method then you can use 3.5-3.75 yds. 
  • studs
  • fabric glue
  • stapler
  • scissors
Step 1: First turn your box spring on its side, I laid out the the fabric starting 6 inches around the corner that will remain against the wall. Secure the fabric using staples (against the wood on the bottom of the box spring) and then pull tightly and secure the fabric on top of the box spring. I made sure that the fabric on top of my box spring (the part that the actual mattress sits on) was even and went about 2 inches over the edge onto the top. If you prefer to use glue that is fine. The method you choose is flexible, as long as you find a way of securing fabric to your box spring so that it is pulled tightly and won't come undone. 

Step 2: On the corners I decided I liked the look of the fold, so I decided to create a crease, and fold the fabric back a quarter inch to add layers. This is where an extra set of hands is useful, one person will need to create the fold and keep it tight while the other person secures the fabric on the top and bottom again using stables or glue. Continue this method all the way around the box spring.

Step 3: The fabric should be pulled tight, secured, and encasing the box spring all the way around. If there is any excessive amounts of loose fabric on the bottom of your bed feel free to cut it off. I did not make perfect cuts because hey, no one will notice whats under your bed. You can now lay down the box spring on the ground and enjoy the fact that the hard part is over, you are so close to finishing a gorgeous new face lift on your bed!

Step 4: Although I have folds made, I first wanted to fully secure the folds so I put fabric glue in the middle of the fold and pressed the fold shut adding pressure.  

Step 5: now time to place the studs, I purchased push-pin studs but if you would like studs similar to the ones in a be-dazzler, or even buttons that would work just fine. I encased my folds with the studs, creating 2 columns of 7 studs. Feel free to add more or less, be creative and find what suits you best! In order to secure the studs I added glue to the back, pressed them in and held them there for a bit to dry. Make sure your lines are even though because you are gluing them in! If you need to mark the spots first, go ahead and do that. 

After its all said and done this was my end product:

After:
The project did not take long at all, it was super easy and my end results were better then I could have hoped for! I hope you guys get inspired to make your own, if anyone makes an animal print bedskirt I would LOVE to see pics!